Arduino download and install
Arduino IDE download link: https://www.arduino.cc/en/software
Select the version corresponding to the operating system to download, and follow the installation prompts to install step by step.
Install RP2040 development board support package
Take Arduino IDE 2.0.2 as an example, enter PICO or RP2040 in the search bar of the Boards Manager, select Arduino Mbed OS RP2040 Boards, click Install to install the RP2040 development board support package, and the latest version is installed by default That's it.

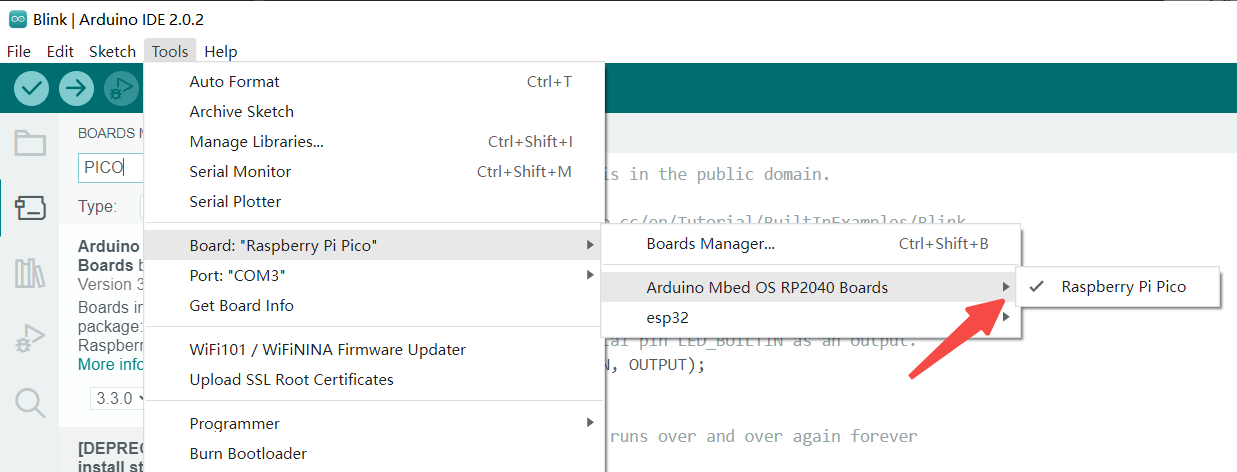
Set the board type
In the upper option bar, click Tools > Boards > Arduino Mbed OS RP2040 Boards > Raspberry Pico.
Connect to the development board
When using Arduino on the BPI-Pico-RP2040 development board for the first time, it is necessary to manually enter the development board into UF2 Bootloader mode, and this step can usually be avoided later.
Make sure there is a type-c data cable, one end is connected to the PC, pick up the development board, keep it free of any connection or peripheral hardware, press and hold the Boot button, connect the type-c data cable to the development board, release the Boot button, A new disk called RPI-RP2 will appear in the PC's system.
Turn on the LED
In the upper option bar, click File > Examples > 01.Basics > Blink to open the Blink example,
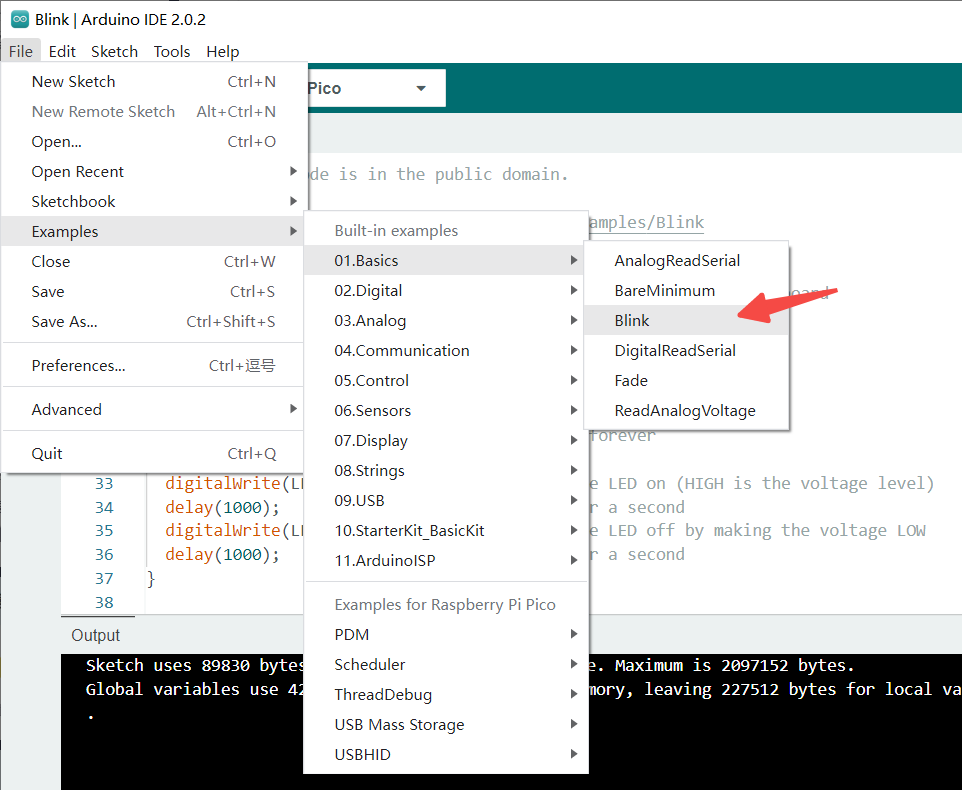
Or directly enter the following code in the code editing area.
void setup() {
  // initialize digital pin LED_BUILTIN as an output.
  pinMode(LED_BUILTIN, OUTPUT);
}

// the loop function runs over and over again forever
void loop() {
  digitalWrite(LED_BUILTIN, HIGH); // turn the LED on (HIGH is the voltage level)
  delay(1000); // wait for a second
  digitalWrite(LED_BUILTIN, LOW); // turn the LED off by making the voltage LOW
  delay(1000); // wait for a second
}
Click the Upload button, the program will be uploaded to the development board after the compilation is complete, and the onboard LED will blink at intervals of 1 second.