Install support using Arduino IDE
![]()
This is the way to install Arduino-ESP32 directly from the Arduino IDE.
Stable version link: https://espressif.github.io/arduino-esp32/package_esp32_index.json
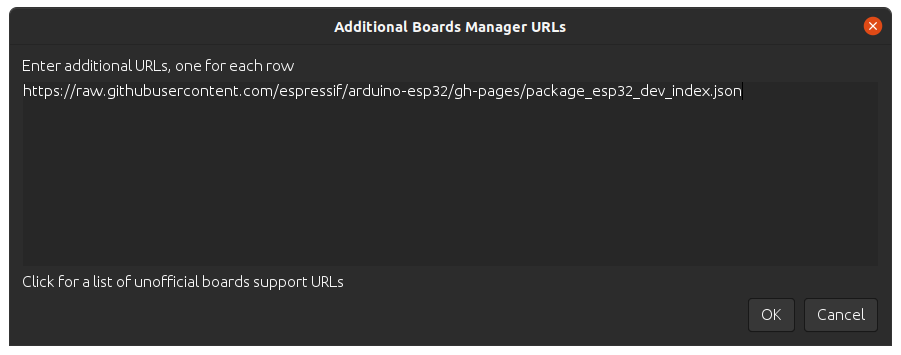
Development version link: https://espressif.github.io/arduino-esp32/package_esp32_dev_index.json
Starting with the Arduino IDE version 1.6.4, Arduino allows installation of third-party platform packages using Boards Manager. We have packages available for Windows, macOS, and Linux.
To start the installation process with Boards Managaer, follow these steps:
Install the current upstream Arduino IDE at the 1.8 level or later. The current version is at the arduino.cc website.
Start Arduino and open the File>Preferences window.
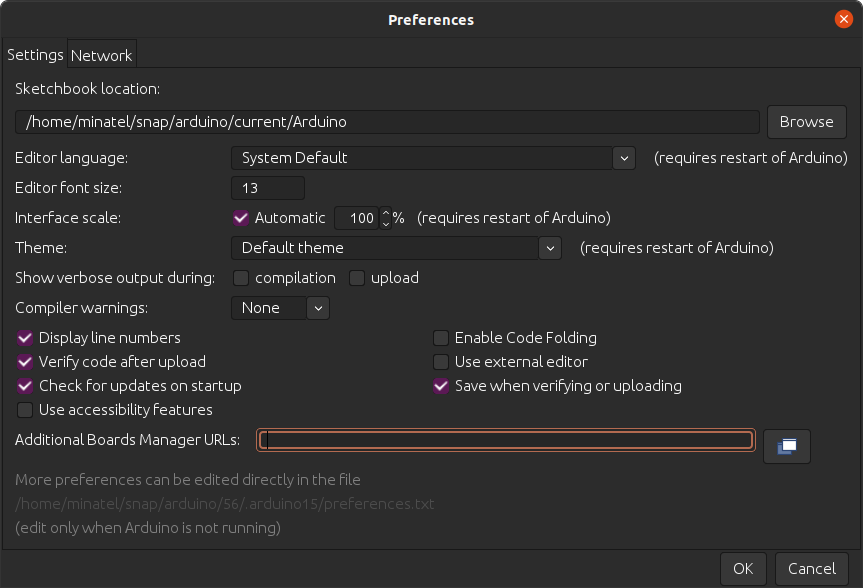
- Enter one of the release links above into Additional Board Manager URLs field. You can add multiple URLs, separating them with commas.
Open the Board Manager from the Tools > Boards menu and install the esp32 platform.
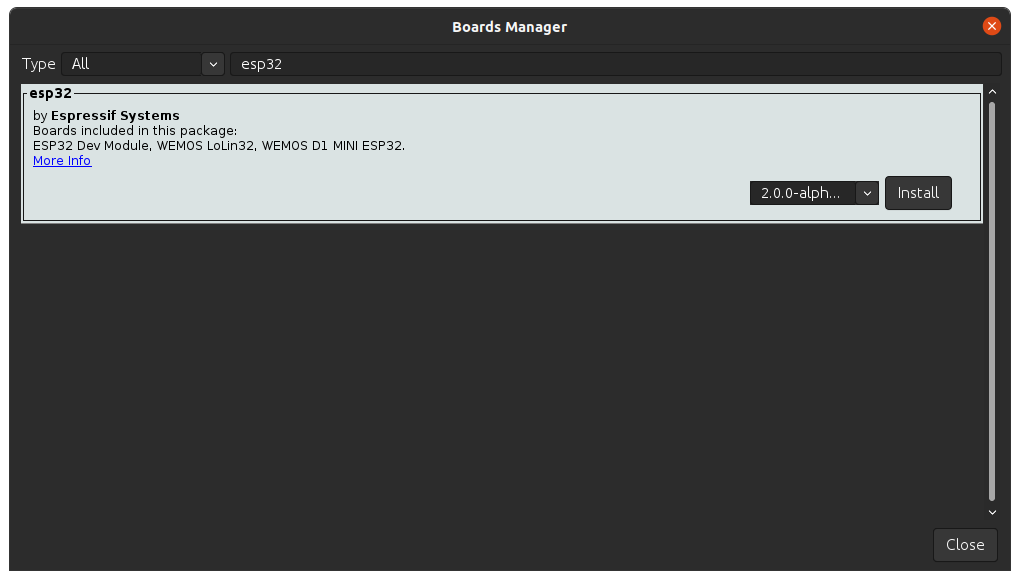
Restart Arduino IDE.
Select
ESP32S3 Dev Moduleboard from Tools > Board menu after installation.Select the correct settings in the Tools menu as shown below.
| Setting | Value |
|---|---|
| USB CDC On Boot | Enabled |
| CPU Frequency | 240MHz (WiFi) |
| Core Debug Level | None |
| USB DFU On Boot | Enabled (Requires USB-OTG Mode) |
| Erase All Flash Before Sketch Upload | Disabled |
| Events Run On | Core 1 |
| Flash Mode | QIO 80MHz |
| Flash Size | 8MB (64Mb) |
| JTAG Adapter | Integrated USB JTAG |
| Arduino Runs On | Core 1 |
| USB Firmware MSC On Boot | Disabled |
| Partition Scheme | 8M with spiffs (3MB APP/1.5MB SPIFFS) |
| PSRAM | QSPI PSRAM |
| Upload Mode | UARTO / Hardware CDC |
| Upload Speed | 921600 |
| USB Mode | Hardware CDC and JTAG |
- Or select
BPI-Leaf-S3board from Tools > Board menu, its default settings can be used directly.